Posts

Showing posts from October, 2017

Documentation

I have attached the documentation in PDF format in the link below. Please let me know if you cannot access the link or having problem viewing the file. Thank you. Documentation

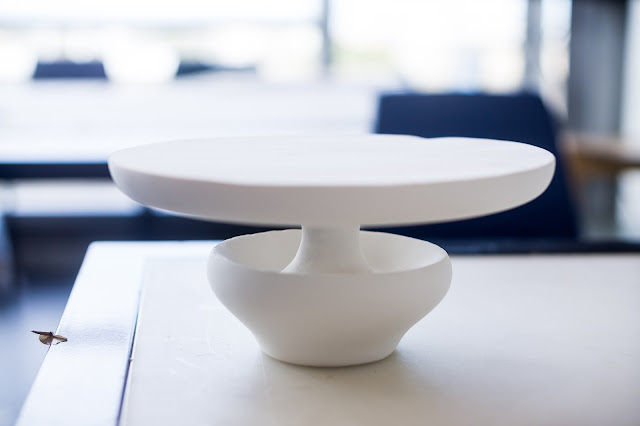
Model 3: "Butter-soft" Furniture by Fernando Mastrangelo

Image
"Butter-soft" Furniture is designed by Fernando Mastrangelo. His idea is to create a butter smooth furniture using cement. This project is a scaled model of one of his furniture. Below is the real furniture by the artist himself. Let's start with the process. I first plotted out the design using AutoCAD software and then print them in A3 paper. I then traced the design onto a foam core, and then roughly trim them using foam cutter into manageable size and shape. I then loaded the foam into lathe machine securely and started setting up the machine to carve the foam. I then carefully carved the foam into desired shape. I started with the bottom part of the model. After carving out the desired shape, I sanded it roughly. And then I cut out the unnecessary part using hand saw. I then proceeded to carve out the top part as well. And sanded it after I got the desired shape. I used plaster to apply onto the mode...

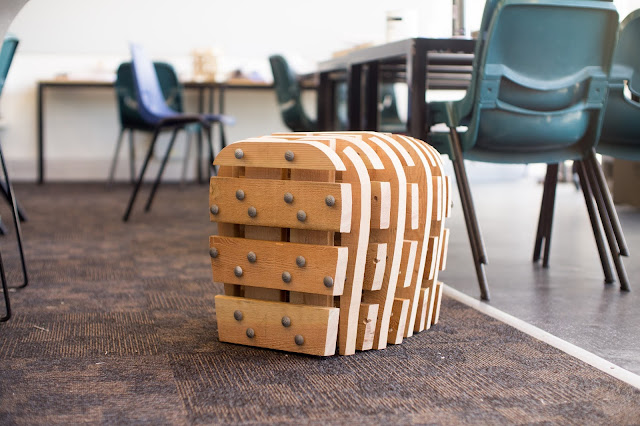
Model 2: Bench Stadium by Andrew Crombie

Image
"Bench Stadium" is a bench designed by Andrew Crombie and placed in Urban Redevelopment Authority building in Singapore. Picture above is the real Bench Stadium, and this project is an imitation to it, with slight adjustment to my liking. Let's start with the process. I first modelled the bench in Sketchup to get the precise dimensions of every details. The bench would be made in real life size, approximately 450mm in all width, length and depth. I then plotted out the design in A2 papers, and then cut them out so that I could trace the shape onto the timber. Speaking of timber, the timber selected in this project is Radiator Pine, which is readily available in the workshop. Moreover it is the most affordable timber in the workshop, which is perfect as I did not want to break my bank making this model. After tracing the shape, I proceeded to band saw to cut out the shape. After cutting out the shape, I continued to disc sander to re...
Model 1: Roof of Centre Pompidou-Mertz by Shigeru Ban

Image
Structural model of the roof of Centre Pompidou-Mertz The first model I did is the structural model of the roof of Centre Pompidou-Mertz. Below is a picture of the building in real life. Due to its interesting shape, I have decided to take on the challenge of making its structural model. Centre Pompidou-Mertz Image from  ArchDaily Required tools and materials: 1. Balsa wood cut into 1mm thick x 2mm wide stripes 2. Staples 3. Tweezers 4. Cutter 5. Mask 6. Sand paper 7. Cutting matt 8. Foam core 9. Masking tape 10. Super glue Process First step is to create the 3D model of its roof shape in order to cut the model with CNC Milling machine. I followed the tutorial on  ThinkParametric  to create the roof by using Rhino software. I then exported it into STL file format, as it is required for the CNC milling. I loaded the file into the computer in the laboratory and started cutting. The estimated time needed ...